Tuesday, November 6, 2018

Water Color Transfer

1. The Process


To start this process you must print off a picture and cut it out. You then need a piece of water color paper. You then water color the paper however you want to. They you apply mod podge to the back of the picture. Generally the more mod podge the better. You then put the picture on the water color paper and press it down. You can use a squeegee to push out and bubbles under the picture. You then need to let it sit out for a while and dry. Once it is dry you can start to remove the printing picture to show the transfer print. To remove the picture you can put your fingers into water and rub the water across the paper. once water has been rubbed across the paper you can start to push down harder keeping water on your fingers. It is easiest to start pushing it off from one of the corners. You have to push hard enough to get the paper off but not too hard to where you remove parts of the transfer. You might have to rub it a couple times to completely remove the paper fuzz. Once all the fuzz is gone you will just have the water color paper and transfer left.

2. My prints

I think that I should have applied more mod podge at the start so that the picture transfer would have been better. When I went there were no clean squeegees left so that made removing bubbles harder. But I think I did a good job removing the paper with water.

Tuesday, October 16, 2018

Printing Processes

Image result for relief printing Relief Process
The Relief Printing Process uses wood or linoleum that is carved onto to make white areas. The grain of woods can give the blacks a different look then plain linoleum. Ink is then applied then a paper is pressed on top to get the final print. The relief process begins with either a wood block or a linoleum block. When using wood you begin by toning the block with an Indian ink wash or jet black film ink. This is used to make a black ground area so that when pieces of the wood are removed it is very clear and distinct. A drawing can then be transferred to the wood with the help of an iron oxide or carbon paper transfer. Once the drawing has been transferred the artist can carve pieces of the wood out to create white spaces. Ink is applied evenly on the wood and a baron is used to push down a paper with even pressure onto the wood to get the final print. When using linoleum, you can use a marker to draw straight onto the plate or use the same transfer strategy used with wood. You can carve into the linoleum just like you would with the wood except it takes less pressure. The inking process is the same.

Intaglio Process

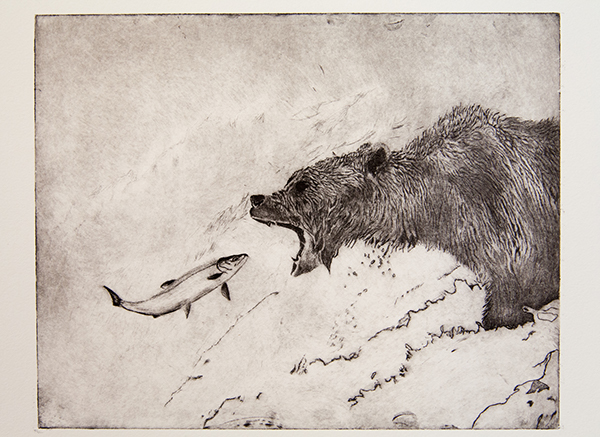
Image result for intaglio printingThe Intaglio Process uses metal which is either moved to create burrs that hold ink or creating a soot that can be scratched off. Once that is finished, ink is pushed and a press is used to put high pressure on a paper above for the final print. Artists like this technique as it gives off a sculptural look.
When performing Dry Point you move away parts of the metal with etching tools to create burrs that hold ink. Once the artist is done Steel Facing can be performed which increases surface strength to help insure none of the burrs break during printing.
Another technique is Etching. A ground is applied to the plate, then it is heated to become soot. Once this has occurred the surface will be a jet black. To draw, the artist barely scratches the surface so that the copper becomes visible as the soot moves away. This provides an area for the ink to go into. Once the artist is done drawing the plate is submerged in a bath of acid this eats away at the bare copper areas so that they can more easily hold ink. This is done for 15 minutes then it is taken out and washed off then bathed again for 15 minutes. Ink is then wiped on the image. After that, the access ink is wiped off. Then paper is put over the metal and put under a press at high pressure.
.

Lithography Process

Image result for lithographyThe Lithography Process is very intricate process using grease and anti grease to get an image. Lithographic pencils and Lithographic crayons are used to draw on the lithographic stone. The drawn on parts can be easily removed with things like razor-blades. The inking process is longer and takes a lot of trial and error.
In this process the artist draws directly onto the stone to start. Once the artist is done drawing Gum Arabic is applied. Once the stone receives the Gum Arabic, acidified Gum Arabic is applied, Tapem for example, which helps keep the Gum Arabic bonded to the stone. Some of the material is then removed and then Gum Arabic is reapplied. Cheesecloth is then used to push the materials into the stone. Asphaltum is then used to replace the drawing material. This creates a greasy base which the ink will be able to replace. The image with then disappear slightly to become a ghost image. If the image is etched properly the ghost image will still be somewhat clear. Then the surface is wet down slightly, dried, then sponged, and immediately inked. Before inking paper, the ink is pushed down into the stone. The softness of paper can give off a different tone. A good inking is found when you can see the hand motion marks on the paper.

Testing One

I would like to try Intaglio Process, because it seems more simple then the others, and I like the general look it gives off. It seems like it would be fairly similar to normal drawing as well. I think some of the looks and feels these types of printing gave off are still trying to be captured by modern artists even if they aren't using these processes.

Monday, October 15, 2018

Personal Narrative

I get to a spot where I can see the sun rise or set. It is relaxing to just sit and watch. The fresh air outside feels great. I hear nothing but wild animals and trees in the wind. The weather outside is perfect.
I relax and watch as the sun comes up over the horizon, into view or while it slowly fades away as the moon comes up on the other side. It is a beautiful sight to open up or close out the day.
I relax and watch. For a view moments I forget about the worries of the day ahead of me. As the time passes I think of nothing else. Once it has past I continue the rest of the day.

I chose the main pictures I liked the most and put them in the foreground. I then layered many other pictures behind the main ones to create a different color and feel as well as define the horizon and give the sun rays. I like how it turned out. I like how there isn't too many pictures in the foreground so it becomes crowded. I also liked what the other pictures looked like with the different and somewhat more exaggerated colors.

Monday, October 1, 2018

Pop Art

Pop Art Project:


I started by going outside and taking pictures of my partner that could work. Once we got back inside a picked the picture I thought looked best and started working. I used a black and white adjustment layer and used the color blending mode to make the colors stand out more. I used a layer mask to sharpen the edges of the shirt and used the halftone filter over my partner. I used bright green, blue, and red in parts of the picture, as well as blacks and whites to make the bright colors pop more. I used the brush tool when adding colors back but I also used a splatter brush with the brush tool to add the blacks and whites that make the colors pop. I used the rectangle tool as well to add more color to the background and a slight pattern.

Thursday, September 13, 2018

Landscape Man Challenge

Landscape Man Challenge

For this project I was given a normal picture of a man and told to do whatever I wanted to do using layer masks, adjustment layers, and blending modes. I started by finding some pictures on unsplash.com that I wanted to use. I decided to use two different city-scapes, one for the jacket, and one for the undershirt. I decided to use a night sky to cover his hair. I wanted to change the background color to a darker color to make the man pop out more so I changed it to a gray background and while doing that I thought that the white outline look good so I ran with it.

I came into this without much of an idea of what I wanted to do but when I got on unsplash.com I found the picture of the city I used for the jacket and liked it so I went with it. I found a second picture of a city to add more variety and differentiate the jacket from the undershirt. I thought a starry night sky would look good over the hair so I searched for a picture to use. I used layer masks to put the pictures I found over the places I wanted them to be over. I used a dissolve blend on the hair to change the texture slightly. Finally I used an adjustment layer to make the night sky-hair slightly darker and slightly less saturated. I think that the photo came out the way I was expecting it to.

Thursday, August 30, 2018

Photoshop Editing Basics

Photoshop Basics

For this project I watched a handful of different videos to learn about some of the basics and tools used in Photoshop. From Content Aware Fill to the Healing Brush to making a Portrait Collage using some of these tools.

1. Content Aware Fill

Content Aware Fill was the first and easiest tools to use. It allows you to remove parts of the background or remove things such as logos from flat surfaces. In the first picture I removed unwanted items from the frame. In the second and third I removed the logo and moved the logo up further respectively. Lastly in the fourth image I removed marks and other objects from the wall in the background.

2. Patch Tool

If the surface isn't big enough, there isn't enough for Content Aware Fill to take from, so it doesn't work. The Patch Tool allows you to select and area and move a similar part of the image in place of that area. I used it to move an image off of the man's shirt. However sometimes the color doesn't match perfectly or a crease duplicates so you have to make slight edits to make it look better.

3. Clone Stamp Tool

The Clone Stamp tool allows you to take a target area and color it somewhere else on the image. I used this to color over tags on this woman's jacket with a sample area from a different part of the jacket. In the second image I used the Clone Stamp Tool to color over a pillar that looked like it was coming out of the man's head by taking samples from the sky.

4. Healing Brush/Spot Healing Brush

The Healing Brush and the more accurate Spot Healing Brush helps remove marks from smaller areas by using other parts of the image automatically. I used this tool to remove dirt and other marks from this boy's face.

5. Portrait Collage 

While creating this portrait collage I used most of these tools. I pulled the images on the right and left in and removed the background from the middle image so that the three images had one uniform background. I used the Clone Stamp tool to remove branches from trees in the background, and to make the sky match up better, and go over the middle image. Lastly I used the Healing Brushes to retouch some smaller sections of the images.

Wednesday, May 23, 2018

Final Project

Q4 Project

For our 2nd Semester Final for e-9 me and my group had to come up with an idea, a product that doesn't already exist, then make a commercial, logo, 2d and 3d animation, and a website for that product. We worked on this project for around 5 weeks and presented our product on the 6th week. When we presented our product the computer we had to present on couldn't pull our animations or commercial up and we had to use a different commercial then we wanted. I learned to make a copy of a finished project so it doesn't disappear and to try to prepare for anything that could go wrong later. We were told that the audience interaction in our presentation was good. I changed and improved on my commercial and animation whenever I had free time in class. I think this was an interesting and fun final project for e-9.

When in class I helped come up with ideas to start our project, I helped make the commercial and edited my own version of the commercial. I helped come up with ideas to make our logo and with Ethan came up with the final color scheme. I made the 2d website animation and when I had free time improved it and the commercial. When I finished early I improved my own stuff and tried to help with the website or give ideas on what we could improve on. At the start I tried to come up with ideas for our project and later sketched ideas for our logo if I had extra time. 

I think I am best at graphic design and animation and I enjoy them the most. I used these strengths to help design our product logo, and make the 2d website animation. 

I could improve these areas by becoming more familiar with Adobe Photoshop and Adobe Illustrator. I could also get better at sketching and find other things to make better projects.

I liked coming up with a product that could be anything even if it wasn't possible to make yet. I would have our group put all the finished projects in the server so that the presentation could have went smother. I learned that if you can work well with a group and combine ideas you can make great things. I think next year I want to overall improve my skill working with these applications and become more confident with my work. I think that this was a good year, it went fast but it was fun.

Semester 2 Final Blog

S2 Final Blog Low-Poly Vector  My favorite project this semester in graphic design was the low ploy vector. I spent around a month...